|
|
First step - Preparation. The helmet's factory finish is sanded with 600 grit wet or with a Scotchbrite pad. If there are any small nicks or scuffs, these may require a bit of fill. Avoid sanding out anything but the smallest paint nicks on a helmet - flat spots will result. All areas that aren't to be painted are taped off and masked. Use quality masking tape, from a autobody shop supplier. |

|
This specific design called for bilateral matching. Thus, it was important to determine the center line and side lines. To do this, strips of tape were used, and after eyeballed, measured to confirm that they matched closely in arc and placement. (Asymetrical designs do not require this step.) |

|
After a final wipe-down with degreaser and antistat, a very light pass of the airbrush is made over the tape to mark the lines without creating a discernable paint edge. Then the tape is removed for good. The rest of the design is painted freehand. |

|
This is the layout step. The airbrush is used exclusively. No pencil, chalk or other marking devices allowed. Only basecoat/clearcoat systems are used - Dupont was used on this job. |

|
The basic color blocks are then painted. Airbrushing is done from the back, forward - major color areas are blocked in, then defined and detailed. This is midway through this step - darker browns, indigo and other shades of blue, white and gold were blocked in as well. |
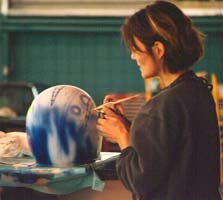
| This is me, painting. (Or pretending to while one of the shop guys took my picture.) I use a very basic, single action Binks Wren airbrush - now so obsolete that it's hard to get parts for it. They make more expensive, more advanced airbrushes, but I'd likely still drop them on the concrete from time to time. I prefer to drop cheap ones. |
|

|
After the basic colors are established, the design is given depth with black. If the design were on a black or another dark background color, the artwork would have been blocked in with white paint prior to applying color, then black detailing added and blended into the base color. |

|
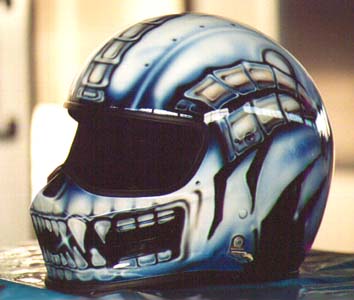
When the basic design and colors are done, white detailing, poofy-stars and outlining gives the design glow and depth - then we're ready for clear. While the airbrushing can be done without too much trouble in the open shop area, clear coating must be done in a paint booth, using protective clothing and respirator. |
|
Finished. |
|